The importance of creating disk images before data recovery
For the large portion of users, the usual way of recovering data is just scanning for files on the selected drive/partition and recovering them on the same destination.
In most cases, the recovery process will be executed without any issues. However, there are potential cases when ...
- the scan might not find all of the files you have deleted or
- the recovery process might not get executed accordingly or
- the combination of first two.
In such situations, the chances of recovering the missing files are almost non-existent since the recovered files have overwritten the old deleted ones. However, there is a way of avoiding these situations by creating a disk image. Undelete has a unique feature fo creating disk images. This way you can create a replica of your drive (sector by sector) and copy it to another destination. This way, you can access your deleted files, recover them, manipulate them without affecting the original deleted files on your drive.
Before starting creating a disk image, you will need a separate drive (not the one where your deleted files are) to store the said image. The drive needs to be big enough and has enough free space to store the image you are about to create. Make sure that the destination drive is formatted in NTFS. Since FAT16 and FAT32 do not support file sizes larger than 2GB and 4GB, it highly likely that the image will exceed the limits of the said file systems.
In our example, we will create a disk image of our USB drive which was previously deleted.
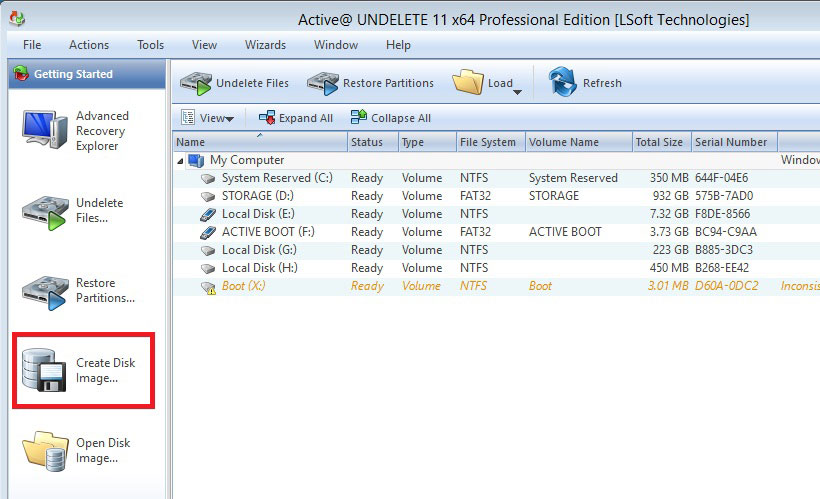
Creating Disk Image
To create a disk image, right click on the drive or a partition where deleted files are and click on Create Disk Image
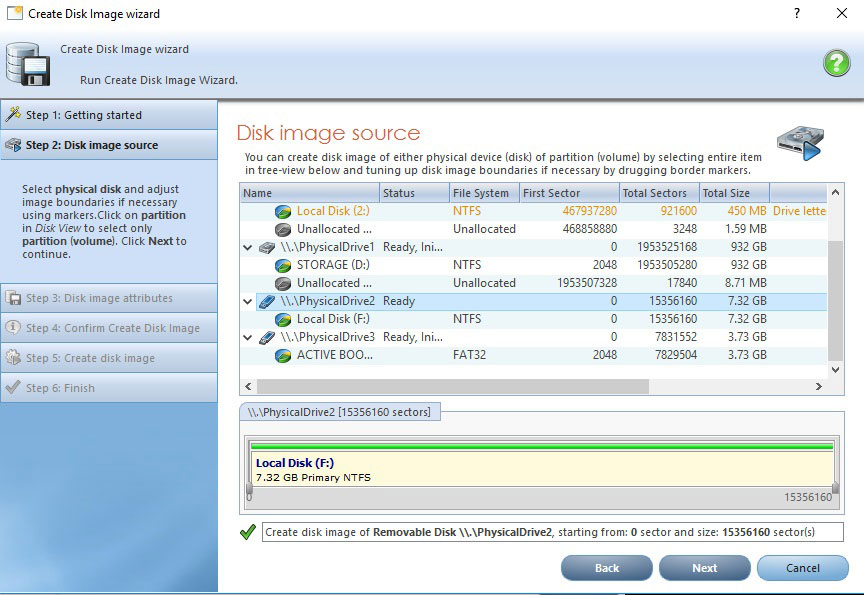
Select the drive or a partition that which you want to create an image from and then choose the destination path where you want to save a Disk Image. If you know the exact sector location of your deleted files or between which sectors they are being stored, you can manually adjust the sliders in the bottom part of the wizard and select the segment boundaries of your disk image. This will not only result in your disk image requiring less disk space, but it will also noticeably speed up the disk image creation. However, if you are unsure about the sector location of your files we recommend that you create a full sized image of your drive or partition. After selecting the drive or a partition, click Next.
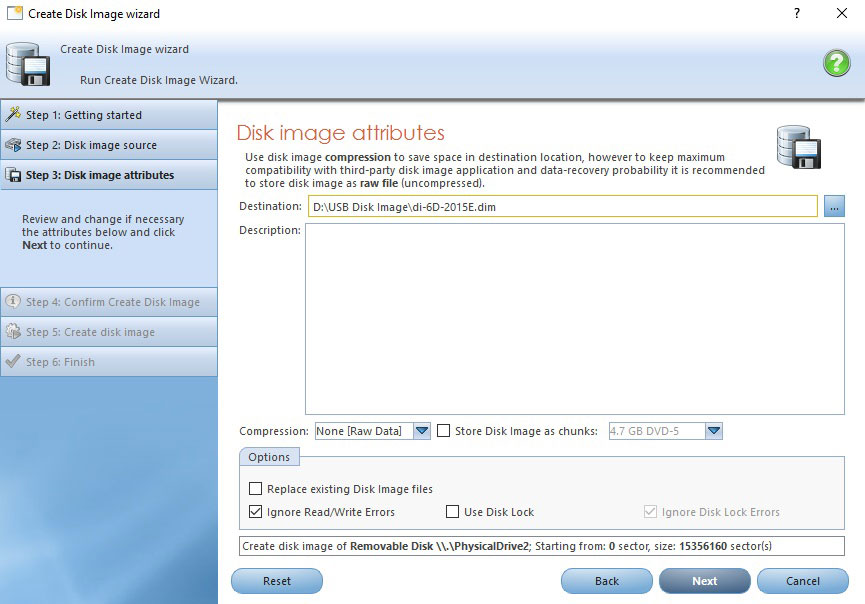
You can also compress the image when creating it and use on of the five compression methods:
- None (Raw Data)
- Fast
- Medium
- High
- Highest
Please bear in mind that the higher the compression, the more time it will take for the disk image to be created. Files such as Microsoft .docs can very much benefit from compression regarding size (up to 70%-80%) while already compressed image files such as .jpegs and .pngs can only be compressed up to few percentages and might not be worth the extra time invested.
For easier navigation, we advise that you create a separate folder where you will store your disk image (USB Disk Image, in our case).
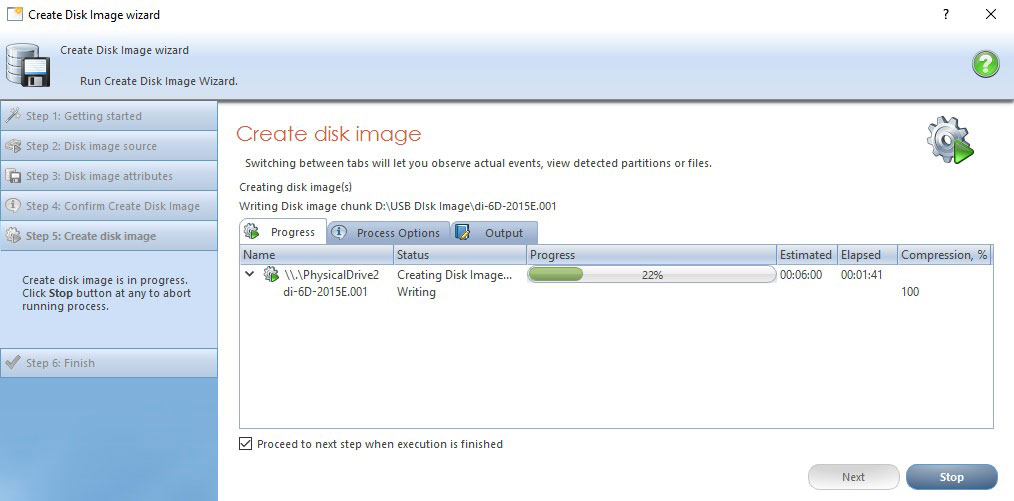
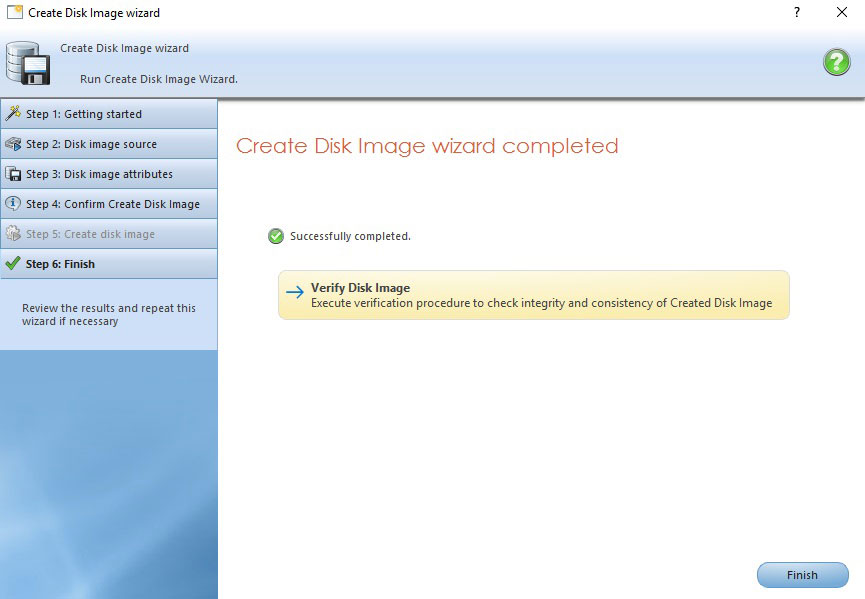
After the process has been finished, you will get a confirmation that the image creation has been executed successfully. You can verify disk image integrity by clicking on Verify Disk Image button which will lead you to Disk Image verification Wizard. Follow the steps and if the image has no issues, the verification process will finish without any problems. If not, then you will have to create another disk image of the same drive.
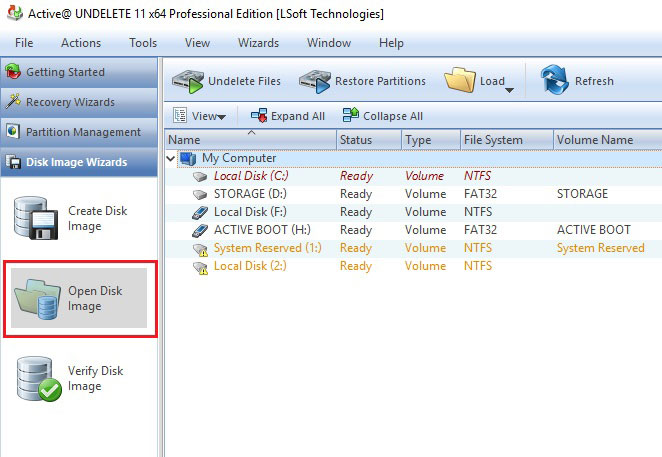
Recovering/extracting files from Disk image
Once you have finished creating a disk image, the next step is dealing with the files that we want to recover. Just click on Open Disk Image in the left menu (under Disk Image Wizards) and click on Open Disk Image.
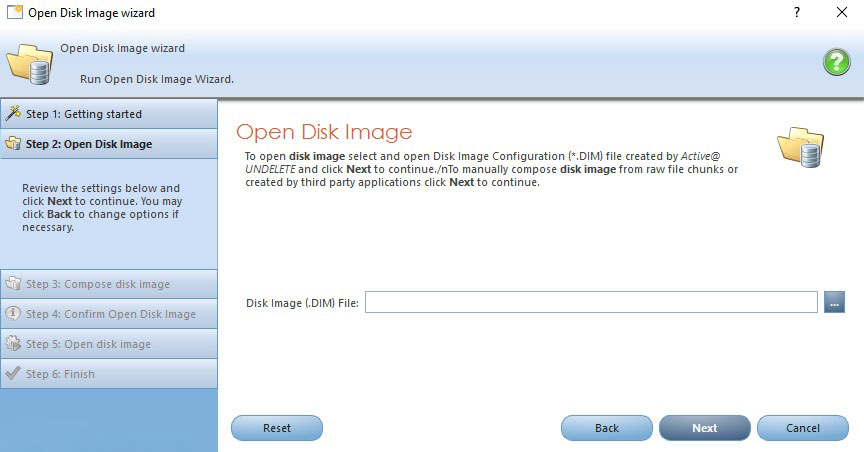
Open Disk Image Wizard will be launched asking you to click on the destination path of the image you have previously created. If you have created the image using Undelete, then the wizard will find your previously saved image by default.
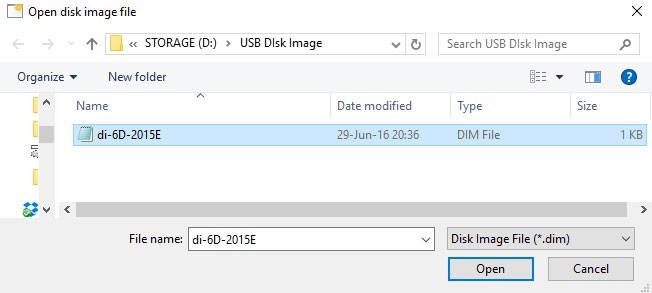
Click on the 1KB DIM file and click open. Don’t worry; this is only the shortcut to your image file stored next to it. This feature offers flexibility to those who would sometimes want to merge their disk images. Merging disk images will be the topic of one of our future blogs, stay tooned.
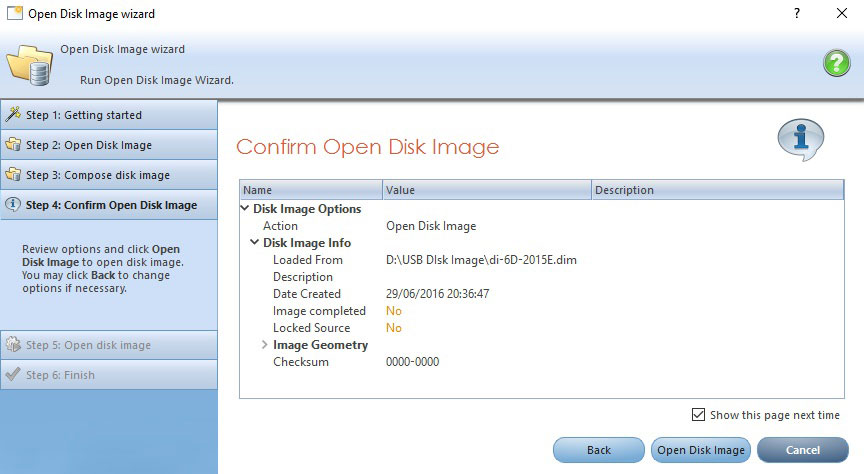
In the next two steps confirm the image you want to open and click on Next and later Open Disk Image
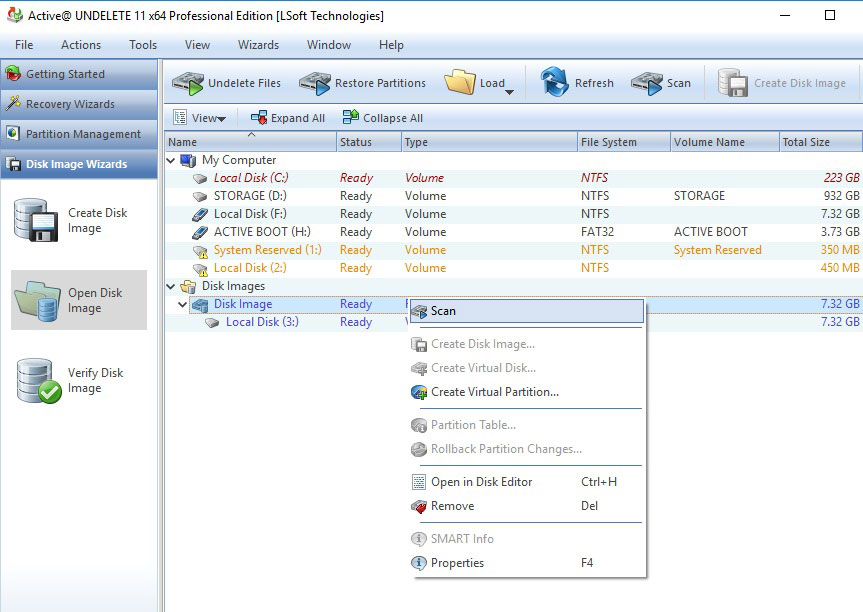
Your Disk image will be open and shown in the Local Drive View. Right click on the disk image and choose Scan option.
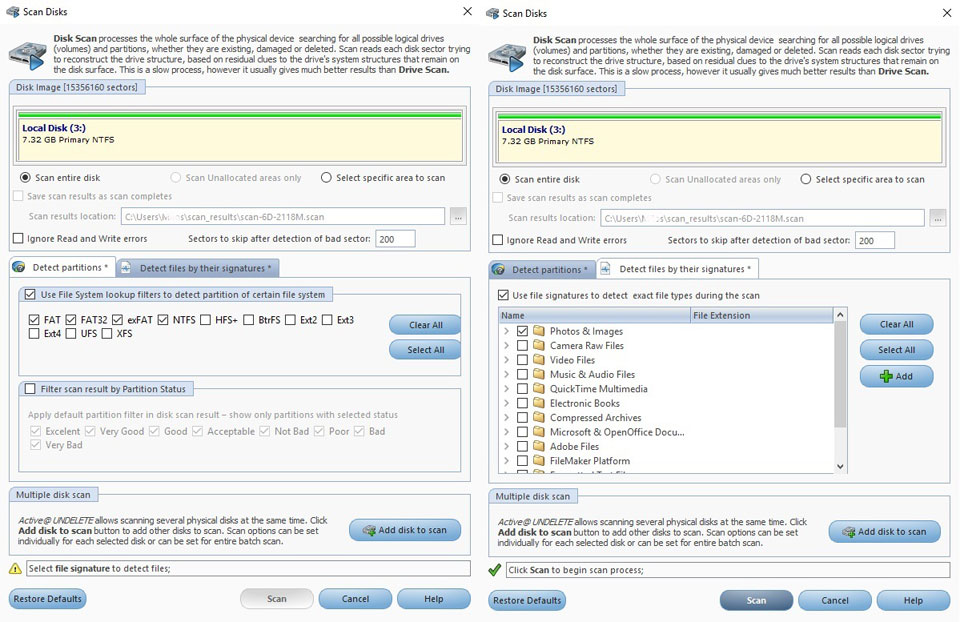
From this point on, the process will continue as you are scanning for files on a regular partition or a drive. Select the file systems you are about to scan in Detect partitions tab (Windows file systems are checked by default), click on the Detect files by their signatures tab and choose the file types you want to recover. In our case, we are looking for Photos and images. Click on Scan.
The scanning process should take considerably less time than the usual scan since much information is already available for Undelete to use.
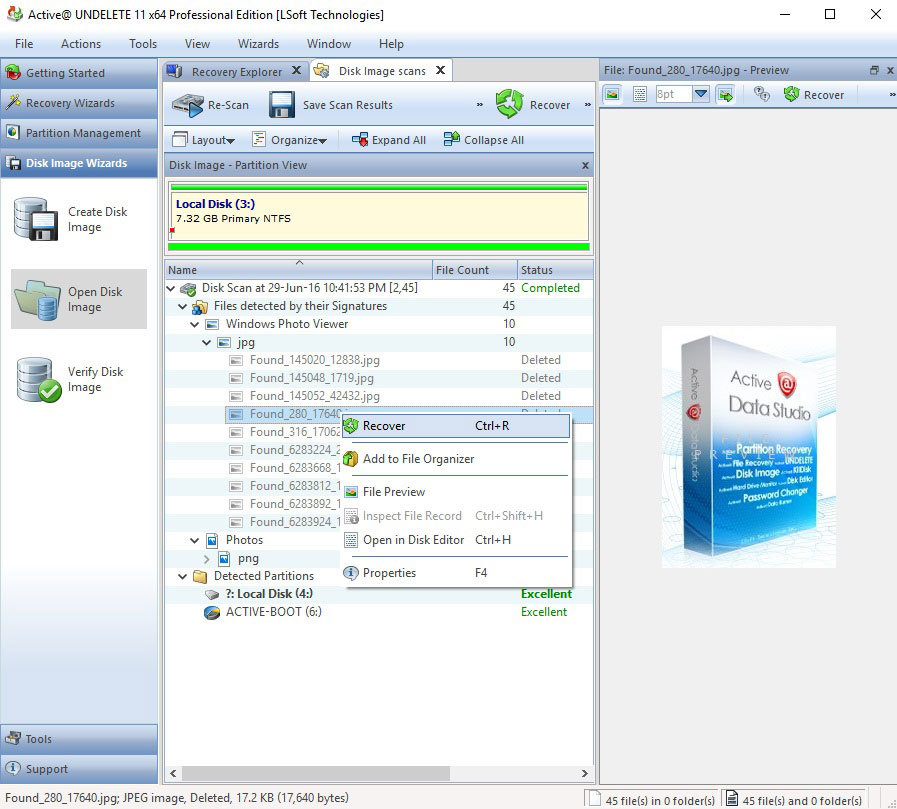
After the scanning has been done, you should be able to see files based on their file signatures in Local Drive View. By just clicking on the file, Undelete will automatically show it in the File Preview (right pane). Right click on the file will open the context, menu where you can recover it immediately or add it to File Organizer where you can add more files later and recover them all at once.
By default, Undelete will store recovered images on the drive where it is installed. However, If the previously deleted files were stored on the same drive where Undelete is, then make sure to change the recovery destination to another drive or a partition.
Conclusion
When it comes to recovering your files (especially sensitive ones) taking every measure of precaution is almost mandatory to ensure successful recovery without endangering previously deleted files. As we mentioned in our introduction, once you recover the data on the same drive if anything went wrong during the scan or the recovery, the files that have been overwritten most likely won't be recoverable. However, using Undelete’s unique feature of creating disk images you can be 100% certain that even if some failure or error occurs you can always go back perform the recovery again.